
Creating your Sourdough Starter from Scratch is a rewarding process. Before commercial yeast, sourdough starter was just yeast! What we label as sourdough starter today, is simply wild yeast.
Bakers have kept yeast in the kitchen long before digital kitchen scales and commercial instant yeast.
With flour and water, you can make a sourdough starter that will bring wonderful flavour to your homemade bread, cakes, pancakes and more!
Check out this full sourdough starter kit and my dutch oven.

What is a Sourdough Starter?
A sourdough starter is a fermented mixture of water and flour that’s used as a leavening agent for making breads, buns, pastries, and all kinds of baked goods. It contains wild yeast and lactobacilli bacteria, which naturally occur in the environment and on the grains used in the starter.
A sourdough starter is nothing more than a mixture of fermented water and flour that traps wild yeast and bacteria from the environment that produces gasses for leavening. Once you have an established starter, making a new one in the future will be much easier as your kitchen will naturally create more yeast in the air.
Step-by-Step Instructions
Day 1:
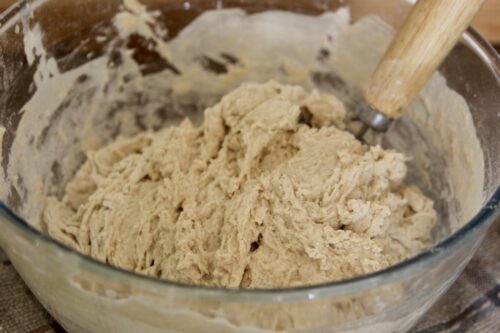
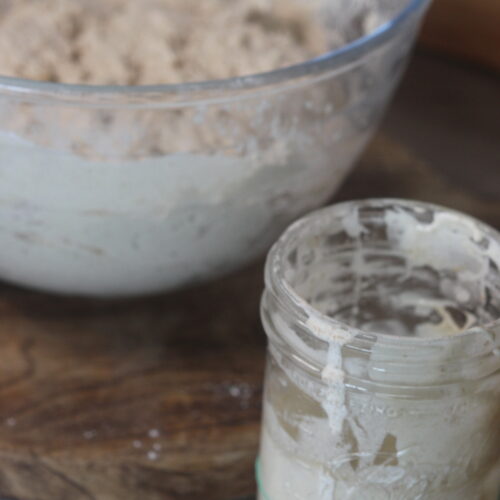
- In a glass or stoneware jar or bowl, combine 1/4 Cup water with 1/3 Cup flour. Stir with a wooden spoon until the flour is totally mixed into the water. The mixture will be a bit thick but should be easy to stir. The consistency will vary depending on the type of flour you use.
- If the starter seems too thick or clumpy, slowly add 1 tsp of water at a time until you reach the right consistency. If too thin, add flour 1 tsp at a time.
- Cover with a loose-fitting lid, towel, or doubled cheesecloth. If air can’t get in, fermentation won’t happen.
- Now that you’ve stirred water & flour together in your container and covered it, you’re finished for day 1. Set the starter on your kitchen counter at room temperature until day 2.
Day 2:
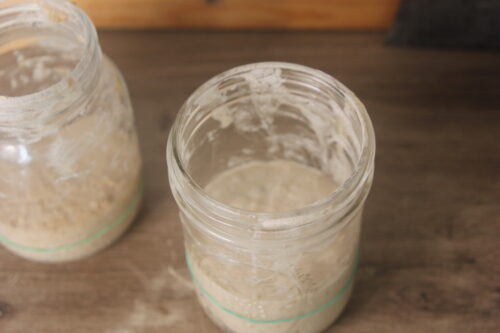
- Uncover the starter and remove half of the contents, discard what you remove. You can bin the discard, add it to your scrap bucket, or use it in sourdough discard recipes. This discarding step is the only step that’s different than day 1.
- Discarding half of the mixture is only necessary when you are establishing a new starter. Once the starter is mature, you wont need to discard half. You can just continue feeding it every day, but keep in mind that if you feed it daily without using any, you’ll end up with a ton of starter and need a very large container.
- Next, add 1/3 cup of flour and 1/4 cup water to the remaining contents of the starter & stir until well combined.
- Cover and store the starter on the counter just like on day 1.
Days 3-7: Repeat the steps from day 2
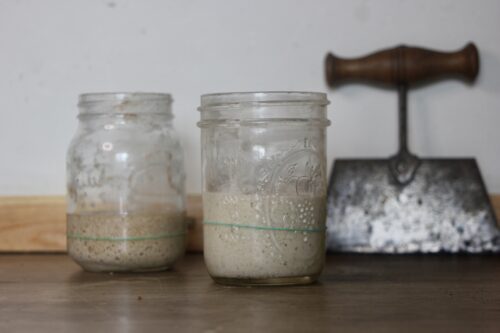
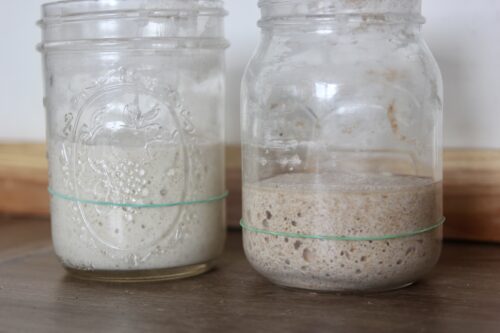
- After a few days, you should notice that your starter almost doubles in size every 12-24 hours when after feeding it. You should also notice air bubbles on the top and that distinct sourdough smell.
- When it has risen to its highest point, this is called the “peak.” After the starter peaks, it will slowly fall back down to where it was when you originally fed it, and then it is ready to be fed again.
- If a starter peaks, falls, and sits for too long before being fed again, it may develop a “hooch” which is a thin layer of liquid at the top. Don’t worry if you see this, it just means your starter is hungry and needs to be fed more often. Bin the water when you discard, feed the remaining starter, and adjust your feeding schedule so it is fed more frequently.
Day 8:
Finally, your starter should be mature enough to attempt baking your first bread! It should peak 8-24 hours after feeding, have lots of bubbles, and smell like sourdough! See my sourdough bread recipe!
FAQ
What is a sourdough starter?
A sourdough starter is a fermented mixture of water and flour that’s used as a leavening agent for making breads, buns, pastries, and all kinds of baked goods. It contains wild yeast and lactobacilli bacteria, which naturally occur in the environment and on the grains used in the starter.
How long does it take to create a sourdough starter?
It takes 8-12 days to create a mature sourdough starter that is ready to use as a leavening agent to bake bread or various baked goods.
How often should I feed my sourdough starter?
A sourdough starter “peaks” (doubles in size) 8-24 hours after it is fed. Once it peaks, it will slowly fall to its original level. Once it has fallen, it needs to be fed again within a few hours.
Can I use whole wheat flour or other types of flour to create a sourdough starter?
Various types of flour can be used – all-purpose flour, whole-grain flour, rye flour, ancient grain flour, etc. Just make sure the flour is unbleached.
How do I know if my sourdough starter is ready to use?
A starter is ready to use when it “peaks” 8-24 hours after feeding, has lots of bubbles, and a strong sourdough smell.
Can I use tap water to feed my sourdough starter?
Yes, you can use tap water to feed a sourdough starter as long as it is not treated. If your water is treated, filter it first.
Feeding A Sourdough Starter
A sourdough starter needs to be fed every 12-24 hours if it is stored at room temperature on the kitchen counter. If stored in the refrigerator, it only needs to be fed weekly. Remember, “feeding” a sourdough starter means adding more water and flour. You can feed it a lot, or a little, depending on how much starter you need for any particular recipe.
Countertop Storage
This is the best option if you’ll be using your starter every day or even every other day. Just remember that a sourdough starter stored at room temperature needs to be fed every 12-24 hours to remain healthy and active.
Just as seasons change, so will your starter. In colder temperatures, if you notice a less active starter, you can get by with fewer feedings – perhaps even every other day at room temperature.
How to Make A Sourdough Starter – Easy Guide
Equipment
- glass or ceramic jar or bowl
- wooden spoon or spatula
Ingredients
- 1/3 Cup unbleached flour (45 grams)
- 1/4 Cup distilled water. If you do not have distilled water, bottled water or filtered water is best (60 grams)
Instructions
Day 1:
- In a glass or stoneware jar or bowl, combine 1/4 Cup water with 1/3 Cup flour. Stir with a wooden spoon until the flour is totally mixed into the water. The mixture will be a bit thick but should be easy to stir. The consistency will vary depending on the type of flour you use.
- If the starter seems too thick or clumpy, slowly add 1 tsp of water at a time until you reach the right consistency. If too thin, add flour 1 tsp at a time.
- Cover with a loose-fitting lid, towel, or doubled cheesecloth. If air can’t get in, fermentation won’t happen.
- Now that you’ve stirred water & flour together in your container and covered it, you’re finished for day 1. Set the starter on your kitchen counter at room temperature until day 2.
Day 2:
- Uncover the starter and remove half of the contents, discard what you remove. You can bin the discard, add it to your scrap bucket, or use it in sourdough discard recipes. This discarding step is the only step that’s different than day 1.
- Discarding half of the mixture is only necessary when you are establishing a new starter. Once the starter is mature, you wont need to discard half. You can just continue feeding it every day, but keep in mind that if you feed it daily without using any, you'll end up with a ton of starter and need a very large container.
- Next, add 1/3 cup of flour and 1/4 cup water to the remaining contents of the starter & stir until well combined.
- Cover and store the starter on the counter just like on day 1.
Days 3-7: Repeat the steps from day 2
- After a few days, you should notice that your starter almost doubles in size every 12-24 hours when after feeding it. You should also notice air bubbles on the top and that distinct sourdough smell.
- When it has risen to its highest point, this is called the "peak." After the starter peaks, it will slowly fall back down to where it was when you originally fed it, and then it is ready to be fed again.
- If a starter peaks, falls, and sits for too long before being fed again, it may develop a "hooch" which is a thin layer of liquid at the top. Don't worry if you see this, it just means your starter is hungry and needs to be fed more often. Bin the water when you discard, feed the remaining starter, and adjust your feeding schedule so it is fed more frequently.
Day 8:
- Finally, your starter should be mature enough to attempt baking your first bread! It should peak 8-24 hours after feeding, have lots of bubbles, and smell like sourdough! See my sourdough bread recipe!
Thanks for helping out, excellent information.